I would like to share with you guys one of my very first design, as a new crocheter. I have used this pattern several time, since I wrote it, and I think that it produces the expected results. However, I’m not sure if the pattern will be as easy to follow, as it is for myself.
So, fellow crocheters, here is my Lamb Lovey pattern that will be up for free, for few months, then you will be able to buy the PDF format on my Titikel Shop.
I would appreciate if you can leave a comment on your experience with this pattern. Feel free to contact me if you have questions.

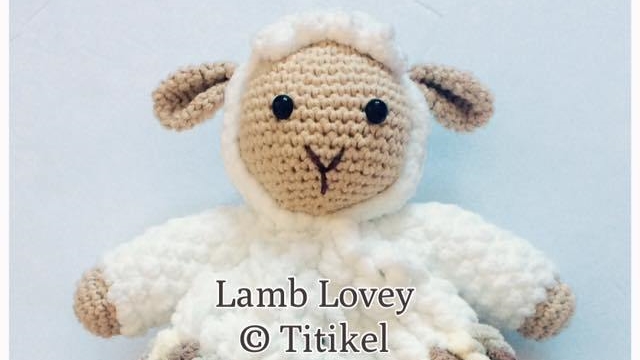
Lamb Lovey Pattern (free)
By Titikel
Materials
| Head interior, ears and hands: |
Additional materials:
|
Head exterior, arms and blanket: |
|
Abbreviations
Round: rnd Single crochet: sc Chain: ch
Stitches: st Increase: inc Double crochet: dc
Single crochet: sc Decrease: dec Half double crochet: hdc
Slip stitch in space: sp Back loops only: BLO
Head interior
Rnd 1: magic ring [6]
Rnd 2: inc 6 times [12]
Rnd 3: (sc in next st, inc in next st) repeat 6 times [18]
Rnd 4: (sc in next 2 st, inc in next st) repeat 6 times [24]
Rnd 5: (sc in next 3 st, inc in next st) repeat 6 times [30]
Rnd 6: sc in each st [30]
Rnd 7: (sc in next 4 st, inc in next st) repeat 6 times [36]
Rnd 8: sc in each st [36]
Rnd 9: (sc in next 5 st, inc in next st) repeat 6 times [42]
Rnd 10 – 15: sc in each st [42]
Add safety eyes around round 12. Start nose at round 15
Rnd 16: (sc in next 5 st, dec next) repeat 6 times [36]
Rnd 17: sc in each st [36]
Rnd 18: (sc in next 4 st, dec next) repeat 6 times [30]
Rnd 19: sc in each st [30]
Rnd 20: (sc in next 3 st, dec next) repeat 6 times [24]
Rnd 21: (sc in next 2 st, dec next) repeat 6 times [18]
Start stuffing with fiber fill and continue stuffing as you go
Rnd 22: (sc in next st, dec next) repeat 6 times [12]
Rnd 23: dec 6 times [6]
Fasten off, leaving a medium string for closing.
Ears (make 2)
Rnd 1: magic ring [6]
Rnd 2: inc 6 times [12]
Rnd 3: sc in each st [12]
Rnd 4: (sc in next st, inc in next st) repeat 6 times [18]
Rnd 5: sc in each st [18]
Rnd 6: (sc in next st, dec next) repeat 6 times [12]
Rnd 7: (sc in next 2 st, dec next) repeat 3 times [9]
Rnd 8 – 9: sc in each st [9]
Fasten off, leaving a long string for closing and sewing.
Do not stuff ears. Sew ears to head exterior.
Head exterior
Rnd 1: magic ring [6]
Rnd 2: inc 6 times [12]
Rnd 3: (sc in next st, inc in next st) repeat 6 times [18]
Rnd 4: (sc in next 2 st, inc in next st) repeat 6 times [24]
Rnd 5: (sc in next 3 st, inc in next st) repeat 6 times [30]
Rnd 6: sc in each st [30]
Rnd 7: (sc in next 4 st, inc next) repeat 6 times [36]
Rnd 8: sc in each st [36]
Rnd 9: (sc in next 4 st, dec in next st) repeat 6 times [30]
Rnd 10: sc in each st [30]
Fasten off, leaving a long string for sewing.
Fringe: ch 1 from edge, sc in next 9 st, ch 1, turn [9]
dec in next st, sc in next 5 st, dec in next st, ch 2, turn [7]
(1 slst, 1 hdc) repeat 4 times or as desired, end with slst.
Fasten off and hide string inside head exterior.
Eyes were my reference for fringe’s starting and ending.
The head interior should fit in easily in the head exterior and tight.
While sewing in the exterior, I’ve passed the string through the fringe as well.
Hands and arms (make 2)
Start with Jute yarn
Rnd 1: magic ring [6]
Rnd 2: inc 6 times [12]
Rnd 3: (sc in next st, inc in next st) repeat 6 times [18]
Rnd 4: sc in each st [18]
Rnd 5: (sc in next st, dec next) repeat 6 times [12]
Change yarn
Rnd 6 – 11: sc in each st [12]
Rnd 12: (sc in next 10 st, dec next) [11]
Rnd 13: sc in each st [11]
Rnd 14: (sc in next 9 st, dec next) [10]
Rnd 15: sc in each st [10]
Fasten off, leaving a long string for sewing.
Stuff hand only with fiber fill.
Before sewing arms to head exterior, compare both arms to make sure they are equally stuffed and look identical.
Blanket
It’s a solid granny square blanket. Since the bulky yarn is very thick, markers are really helpful. For the blanket, I’ve used 3 markers. One to help locate the 5th chain, to slip stitch, one to help locate the first stitch following each corner and one to help locate the last stitch. Tamara from Moogly has a simple video that can be help better understand how to work the blanket.
Start with white yarn
Starting point: ch 4, slst to make a ring
Rnd 1: ch 7 [counts as first dc and ch 2]; (dc 3 in ring, ch 2) repeat 3 times; dc 2 in ring, slst to 5th ch of ch 7
Rnd 2: sp; ch 7, dc 2 in the same space; (dc in next 3 st, [dc 2, ch 2, dc 2] in space) repeat 3 times; dc in the last 3 st, dc in space; slst to 5th ch of ch 7
Rnd 3: sp; ch 7, dc 2 in the same space; (dc in next 7 st, [dc 2, ch 2, dc 2] in space) repeat 3 times; dc in the last 7 st, dc in space; slst to 5th ch of ch 7
Change color – Little Sandcastles
Rnd 4: sp; ch 7, dc 2 in the same space; (dc in next 11 st, [dc 2, ch 2, dc 2] in space) repeat 3 times; dc in the last 11 st, dc in space; slst to 5th ch of ch 7
Rnd 5: sp; ch 7, dc 2 in the same space; (dc in next 15 st, [dc 2, ch 2, dc 2] in space) repeat 3 times; dc in the last 15 st, dc in space; slst to 5th ch of ch 7
Rnd 6: sp; ch 7, dc 2 in the same space; (dc in next 19 st, [dc 2, ch 2, dc 2] in space) repeat 3 times; dc in the last 19 st, dc in space; slst to 5th ch of ch 7
Change color – White
Rnd 7: sp; ch 7, dc 2 in the same space; (dc in next 23 st, [dc 2, ch 2, dc 2] in space) repeat 3 times; dc in the last 23 st, dc in space; slst to 5th ch of ch 7
Change color – Sonoma
Rnd 8: sp; ch 7, dc 2 in the same space; (dc in next 27 st, [dc 2, ch 2, dc 2] in space) repeat 3 times; dc in the last 27 st, dc in space; slst to 5th ch of ch 7
Rnd 9: slst in each BLO (with 2 slst in each st of the corner)
Fasten off, leaving a medium string for closing. Hide the end.
Tips for sewing in and finishing your project
Sew in each part tight and pass 2 times to secure. Once you are done sewing in, insert the needle close to the point where you have finished sewing in and exit in the opposite side (going through the fiber fill). Leave a very small string and pull it back inside using the needle or hook.
Arms are attached to the head and the head attached to the blanket.
Before attaching both arms, place them first using silk pins to make sure they are well aligned in both side of the head, with the curvy part facing outside.
Congratulations! Your Lamb Lovey is ready for cuddling.


This is adorable!! I can’t wait to try it. It is officially going on my to make list. Ill let you know how not goes. 😁 thank you for sharing it!
LikeLiked by 1 person
Thank you Zola. You know that your article on knitting had an impact on my blogging decision, lol. I had wordpress for years and never moved forward writing. Here you go with another WIP, lol. Still can’t wait for your feedback.
LikeLike
thank you for sharing lm going make this lamb for new family members its so adorable thank you again
LikeLiked by 1 person
You are welcome. Thanks for stopping by.
LikeLike
Thank you for sharing your work. I will definitely put this on my To Do List.
It seems straight forward enough however, just a suggestion – my first reaction when reading the pattern is the need for step-by-step photos. This would help people greatly (especially people new to crochet and amigurumi.) For example, there is no explanation regarding the ‘interior’ and ‘exterior’ parts of the head – a picture would explain this really well.
LikeLiked by 1 person
Thank you very much for the suggestion. I’m actually working on a more elaborated version with pictures. I’ve tried to provide additional instructions in “italic”.
LikeLike
You lovey is beautiful and I have the yarn needed to make this. Thank you for sharing.
LikeLike
Thank you. Can’t wait to see it
LikeLike
what size hook do you use for this pattern
LikeLike
Thanks for your question, I will update the pattern. I use 2 sizes. Hook 4 for cotton (face and hands), hook 6 for the chunky yarn (fur and blanket).
LikeLike
When you say hook 4 and 6 is that US G and J?
LikeLike
Yes.
LikeLike
Can you give approximate size of finished lovey? How big is the head, how “tall” is it when finished? It is so adorable
LikeLike
Another question….What kind of yarn did you use? what is the white yarn that it looks puffy? Does the interior head fit inside the exterior head to the “neck” area? A picture of front and back would be helpful as well as pictures along the way. Thanks!
LikeLike
The white material is Bernat Baby Blanket (super bulky). The interior head fits in the exterior head, and both looks like a ball. Then I sew the ball directly to the center of the lovey. Hope this is clear. I’ll try to update the pictures as suggested.
LikeLike
The Lovey including the head is pprox 10″ x10″
LikeLike
The Lovey including the head is approx. 10″ by 10″ tall. The head looks like a small ball that can fit in your hand.
LikeLike
So cute! What type of yarn did you use? The “Material” you used does not load.
LikeLike
Sorry about that. And I was away of the internet while on mat leave. I will try to update. Thks
LikeLike
Thanks
LikeLike